


🕹️ Elevate Your Game with Drift-Free Precision!
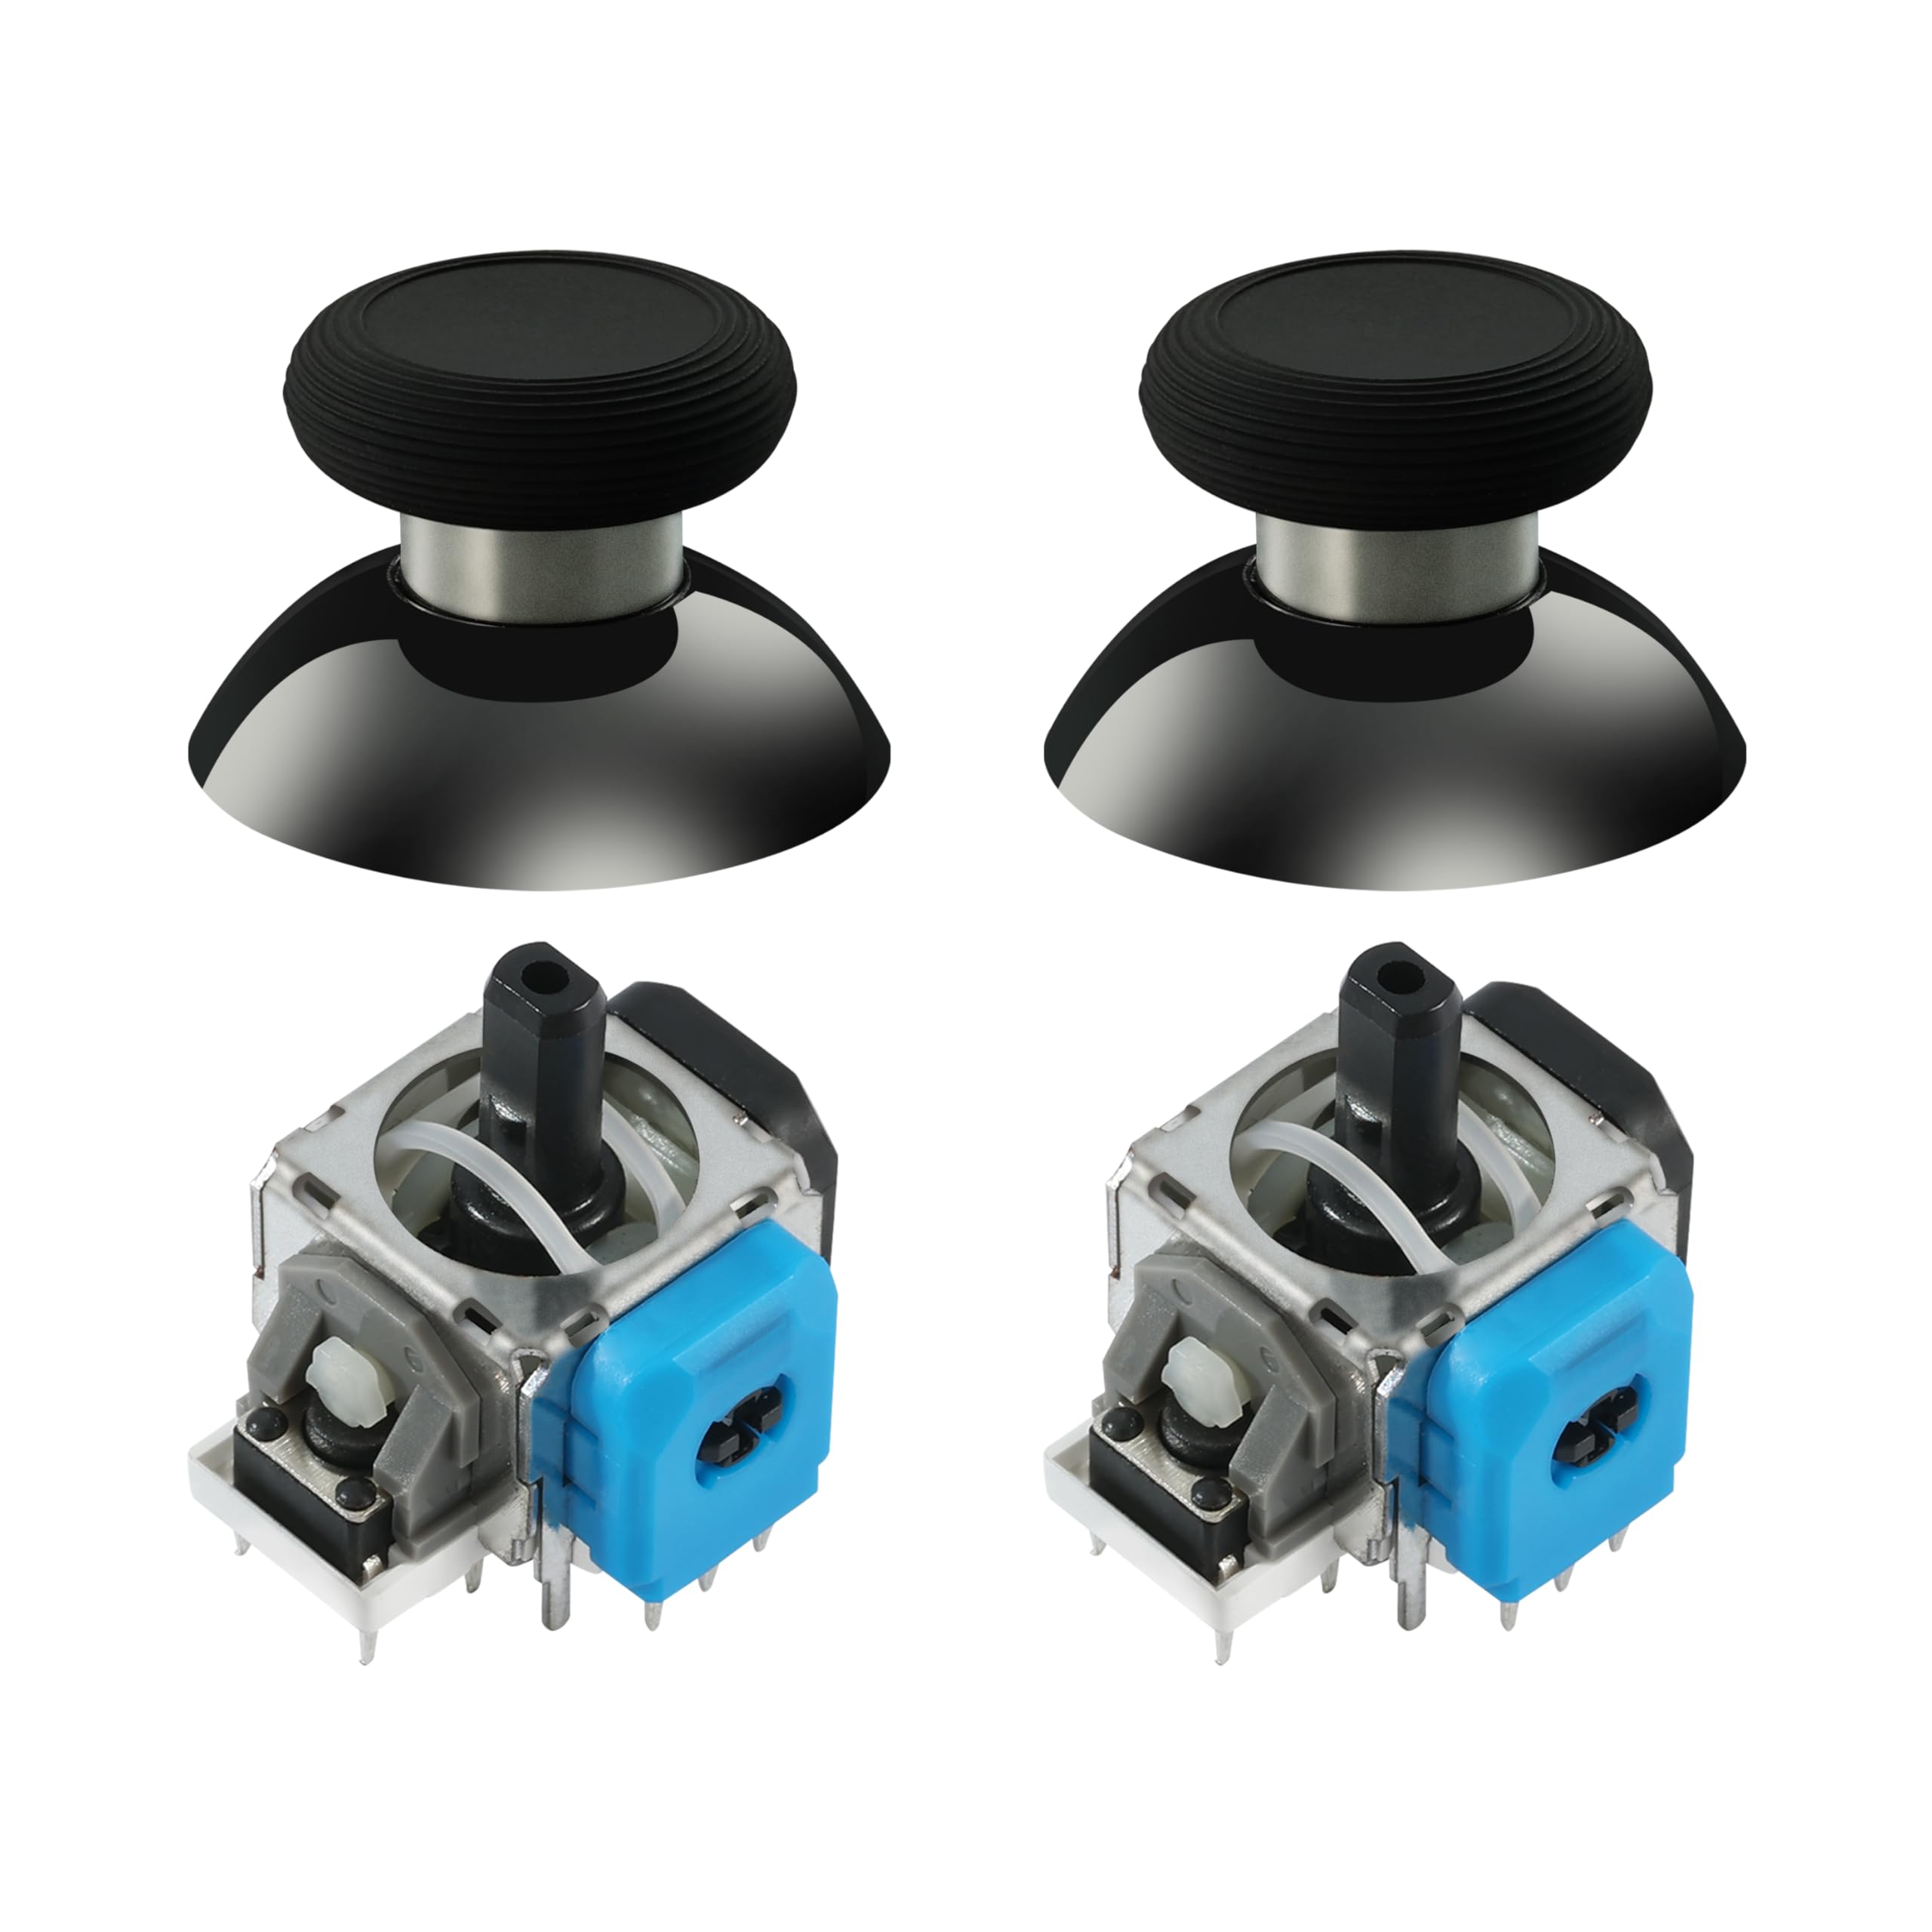
The GuliKit TMR Magnetic Joystick Replacement Kit upgrades your PS4 DualShock controller with advanced Tunnel Magnetoresistance technology, delivering ultra-low power, drift-free accuracy, and enhanced durability. Designed for direct replacement with anti-interference features and premium stick caps, it requires professional soldering for installation and calibration to restore peak joystick performance.


T**L
Nice joysticks, watch some videos first. This is not for someone not familiar with soldering basics.
Not a fun install, but work as intended once you get thru soldering. Make sure you have some solder wick, flux, and a nice soldering iron. I found it easier to cut the old joysticks out in pieces, use some snips and cut the top corners to have four separate pieces. Makes removing the old pots/and joystick a lot easier. Hopefully these last forever. If they don't I'll come back and update my review. Update 2: 9/5/25Ordered another set for another one of my kids drifting Xbox controllers. This time I ordered a desolder gun and it made installing waaaaay easier. New pots work perfectly as are the ones I installed on my original review.
S**S
I BOUGHT 2 would buy 10 if I had to
This is an upgrade from standard or Hall effect toggles and it’s priced accordingly it carries with it adjustability through pc calibration and a huge improvement on the feel and function of my controller! No drift EVER build quality is 8/10 10 being NASA 1 being a light switch and if you order correctly it fits perfectly it is a “ partless magnetic toggle. No more wear and tear but you do have to have some form of electronic repair skill or you’ll have to outsource
J**S
Quality control sticks, but not a beginner install.
Ordered this for my son's PS5 controller. Left stick was drifting and jumping around and verified with a few different testers. This is definitely NOT a plug and play install, so you need to be familiar with soldering and desoldering. I have built keyboards for a hobby for a while so overall this was not a difficult install for me. Only issue, I forgot to remove the ribbon cables and got the iron too close, so this repair cost twice as much in the long run. Once everything was done, the calibration was only slightly off and the GuliKit calibration site got them dead on. My son is now in love with his controller again and having been using his mom's PS5 controller while he waits, he says he can feel a definite difference between his upgraded controller and the standard one. I'll be keeping this kit in mind for the other controllers in the house at a later date.
C**E
One was defective and need to contact seller
One works flawlessly right away, the other not so much. The defective one has a dead axis and I cant return it because I cant remove them without completely ruining the set. I would like to contact the seller for their options but Amazon litterly got rid of the contact seller button, but rather just return it which is almost impossible because its soldered components. I did reflow the solder 6 times (wicked and reapplied) to make sure its wasn't me.
C**M
Great project
I thought I could try these, or get a new controller to fix my stick drift issue. Decided to try it for the soldering practice, and while I'm no expert, they went in fine and work great. While I had the controller apart, I replaced the battery (which is far more simple). If you try it, I recommend getting a dedicated desoldering tool/iron. It made this project go 10x faster and much cleaner. After calibrating, they're perfectly aligned and don't drift at all.
A**Y
Smooth! Soldering experience required.
Great little kit! Soldering experience is recommended. Actually, putting the new ones in is the easy part. Desoldering the old components is the hard part. I used a combination of hot air and my iron with wick to remove the old ones. If you don't have a hot air rework station or a quality iron, you're gonna struggle.They are easy to calibrate and smooth as butter now that they're installed.
B**N
Worth the effort, works great
I know how to solder and desolder so these TMR replacement joy stick units were a joy to install and use. I repaired my PS5 controller which was drifting to the left. I replaced both joysticks and didn’t even need to be calibrated. You Tube had ton’s of ways to do the job. I chose to desolder the old sticks using a desoldering machine. All this costs money and I could have gotten a new controller for half the cost but this is the second pair broken. I have friends with the same problem and other devices which it makes sense to repair so I’m set and might go into business.
B**O
Direct replacement for X-series joystick controllers
Update 2: Replacements arrived and installed. It doesn't seem like the rough movement of the left joystick, nor having to recalibrate the right joystick after each power-off cycle, are present. I think 3 stars is fair, considering the work involved with having to desolder the bad joysticks and reinstall the replacements. Hey Gulikit, how about a bit more effort on the QC side?Update: They lasted one day of heavy gaming and are now shot. Hoping for better quality replacements. We shall see.Installed and calibrated these yesterday on an X-series XBox controller, they work well. You really do need some basic soldering and desoldering skills (and the tools needed to disassemble the controller). There’s an excellent disassembly how-to on ifixit.com. You don’t need to fully remove the two circuit boards but they do need to be separated and maneuvered so one of the controllers can be removed.They calibrated almost perfectly with the MS calibration app. One of the controllers had a small dead zone in the NW quadrant, very close to the edge, but not severe enough that I was going to undo all my work! In BO6 it doesn’t show up in the dead zone calibration.
Trustpilot
4 days ago
3 weeks ago
3 days ago