🏆 Unleash the Power of Epoxy for a Flawless Finish!
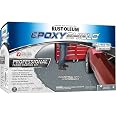
Rust-Oleum Epoxyshield® Professional Floor Coating is a high-performance, solvent-based epoxy designed for garage floors, basements, and workshops. It offers superior chemical resistance, durability, and a semi-gloss finish, covering up to 400 sq ft per gallon. The product is ready for heavy foot traffic in just 1 day and vehicle-ready in 4 days, making it the ideal choice for busy professionals looking to enhance their spaces.
| Manufacturer | RUST-OLEUM |
| Part number | 238467 |
| Item Weight | 11.8 Kilograms |
| Product Dimensions | 36.2 x 18.42 x 21.59 cm; 11.79 kg |
| Item model number | 238467 |
| Size | 256 Fl Oz |
| Color | grey |
| Finish | Matte |
| Material | solvent based |
| Item thickness | 17 Inches |
| Item Package Quantity | 1 |
| Coverage | Approx 300-400 Sq Ft |
| Specific uses | Interior/Exterior |
| Included components | Detailed Instructions, Decorative Chips, Stir Stick, Epoxy Coating |
| Batteries Included? | No |
| Batteries Required? | No |
P**X
moderately to very good
I did my 120sq' garage floor just today.I've been a residential and commercial painter for over 30 years and have used nearly all products/materials one could think of. I found the Rust-Oleum to be adequate, and was convinced that all was okay with it after having read some of the reviews and having spoken with another painter, familiar with this brand of epoxy.The product was delivered with evidence of a slight leak, which was due to the lid being somewhat separated from the can. Only a minor amount of the resinous gray material was spilled and all seemed okay otherwise, though I didn't really like the fact this had happened at all. Measures should be taken to prevent this (e.g., a strip of sealer taper along the lids).Anyhow, I still proceeded forward, mixing in a separate container, about 1/2 of each can, which was plenty for the space I was covering. I still have enough (unmixed) for a 2nd coat, should I decide to apply it.The floor is only 2yrs old and in excellent shape, though I still sanded and etched (muriatic acid) before hand. Shortly afterwords (10 mins or so) I pressure washed the floor twice, and then I shop vacuumed any residual water and let my dehumidifier run for a few days thereafter. I also did a moisture test using a plastic sheet which was taped to the floor for over a day, which yielded no detectable moisture.So far, no one has mentioned the use of a moisture meter. I have a German one I had bought about 15 years ago (one of the best investments for a true painter!) It displays a table for both wood and masonry, which indicates (in a percentile reading) moisture content within the respective surface type. Alas, all was dry (6%-8% in my situation). I've heard general contractors mention that concrete foundations and slabs are usually never really 100% dry, due to contact with the ground, though I suspect that may be a regional question. I'm in Rhode Island (NE United States), but would believe Florida or Arizona to be much more arid. However, don't get overly caught up in relative humidity and the like, especially if you really work in the product and have it mesh and bond with the surface/substrate.Here are the Do-s:-Follow all instructions provided, especially the etching; watch any related videos as well. Do mix as specified. I used a power drill and a long, paint mixing bit.-Read some more reviews, the good and the bad, and try to infer what the common problems and/or advantages may have been for others, and keep that information in mind upon your approach to the job.-Vacuum, vacuum, vacuum...right before application. If possible, use a well constructed vacuum (Miele) with sufficient filtration so as not to reintroduce any particulate back into the work space. If you only have a shop-vac, drape a moist cloth over the exhaust vent so as to collect any dusty blowout.My initial consideration to use a tack cloth was dismissed as being unnecessary in my situation, though others may have the need, which is almost always part of a great prep phase, particularly when it comes to wood stains/preservatives. I primarily like to deal in producing a furniture-quality result within my paint or stain applications. in this regard, the same approach to keen preparation should be considered for a solvent/masonry job. Treat your prep phase as equally crucial. I, too, feel that if preparations are highly considered, anyone can complete this task to at least a near-professional finish (or better).-Use a roller sleeve designated for epoxy or urethane. I (albeit hesitantly) stopped by Home Depot (who stock this epoxy product) though they had no such sleeves for sale, let alone within their inventory. The 2 reps advised me that any roller would do, which is nonsense...another reason to avoid HD and their paint department entirely. When humbly and politely asked if either of them had worked with the product, or epoxy in general, neither did. As I offered to them, other rollers will fall apart as epoxy, by nature, is extremely viscous and tacky, especially when nearing the end of its open time.-Be liberal with the product, though WORK it into the surface. Keep a wet edge where you can, and attempt to roll in varying directions upon the working area as you make progress. Don't overwork already drying areas, wait to see if a 2nd coat will be needed and address the issue(s) then. Remember, you may always have 2 simultaneously drying edges at any time, should you do square swaths or patches. I'd recommend this approach and that they be upwards of 4'sq in dimension. Work swiftly and evenly and let no one be around to distract you, not even for a related conversation about what you're doing.The Don't-s:-Do not forget to use a respirator. Whomever said (in another review) they felt no need to wear one is sadly mistaken. This is a fairly toxic product and sustained exposure will effect anybody. My wife is complaining (10 hours later) that the house "smells horrendous". I returned home 8 hours after this job and my whole 1st floor was obnoxious. Don't let this dissuade you from using the product however, as this is typically an indication that the product is really rather good, like the oil-based paints of yesteryear...Anyways, don't forget to wear a decent respirator or be prepared to have much of your nervous system standing on end, and for at least a little while...-See the job all the way through and don't reach a stopping point thinking you can return in 5 or ten or however many minutes later. See it through! For an area larger than my own, perhaps 2 people are advisable. Or at least a 2-person scenario could alleviate some of the burden of the job, as a sustained, even application should feel slightly arduous to a even a pro. But the key is the even and steady application. One should have worked up a light sweat while during the application process. If not, I'd question the efficacy of their approach/method.-Don't forget to wear protective gear, such as eye-shields (glasses) and gloves. If you're inexperienced or don't have ratty jeans or painters clothes in general, wear old clothing you don't really care about, because anyone should expect some degree of mess by the end.-Don't worry about very minor drips/touch marks, etc., as you go, the product does in fact boast a good open time, meaning you will be able to work in the blemishes as you go, especially if upon a more cool surface.-Don't go cheap on a cut-in brush. A somewhat stiff bristle brush is advisable, though throw it away afterwords -- cleaning up with xylol is really not worth the additional cost and chemical exposure. Same with the roller sleeve(s), just chuck it all away but do wipe down any residual product from tools/knives/roller handles/mixers, etc.All-in-all:A very decent end result, even after only one coat, which could in fact be adequate.I will likely apply an additional coat after a few days, but am really not sure at this point, as it uniformly looks very good. It is, after all, epoxy.Even though I always advocate at least 2 coats, this 1st application is looking tight thus far and I'm rather pleased. On a 2nd coat, I may add some aggregate, like silica sand, just to give some tooth to the surface and mitigate potentially slippery conditions.I will try to update this review as time passes. So far, I would recommend this product.Lastly, I opted out of the flecks...a touch gaudy for my tastes.Best of luck!
A**E
Good quality coating.
After doing a some research on different concrete epoxy coatings for my garage I decided on this one. I decided on this coating after looking at some more professional type coatings that were a lot more costly and the home depot type coatings which were a water based epoxy. This one seemed to be somewhere in the middle. It wasn't too pricey, but was also not a water based epoxy. Keep in mind the Rustoleum coating that they sell at the big home improvement stores comes in nearly the same packaging, but is not the same product, it is more of a residential grade product.I ordered two packages of the coating to cover a three car garage. This kit comes with only the epoxy and the coloring flakes. You will need to get a concrete cleaner and or etching solution to prep the surface.Both of my packages arrived pretty banged up. The cans of epoxy had some pretty good dents in them, but fortunately none were ruptured. Since the product hadn't leaked I didn't really care that the packaging was damaged.I followed the directions and product mixing and application went pretty smooth. My garage concrete is broken into sections with expansion joints so I applied the epoxy to one section at a time and tossed the paint flakes after each section was complete. I have to say the dark grey coating would look good without the paint chips but I decided to use the chips to give the surface some grip in case it ever got wet. I found it a little tricky to get the paint flakes to cover evenly and there are some sections that look heavier than others.The biggest thing I was worried about was hot tire pick up. So far the coating has made it without any problems through a summer with several weeks of 100+ degree days and three separate cars parking after 20 minute commutes. I have tried to avoid turning tires to much when the cars are parking or backing out.So far I have dropped oil, wood stain, engine coolant and had no problems with clean up. I did drag a wooden pallet on the coating and it left mark. Overall very happy with the coating. Durability and looks have met my expectations. I wished I had purchased another one or two so I could do two coats. Two packages barely was enough to cover a three car garage.
B**L
I would never own a garage that is not coated now
12 months ago I applied this to my garage and I would never live in a house without putting epoxy on the garage floor again! I do a lot of car work and maintenance in my garage so I have putten a lot of wear and tear on my floor and it has held up very very well. You can scratch the floor if you drag heavy objects across it, but it takes quite a bit to make a mark. Even when you do scratch it it doesn't go through, and I color matched an extra kit so I could touch things up after a few years.The rubber bits make the floor pretty grippy, which does decrease the effectiveness of a floor squeegee a bit, but not enough that I would suggest avoiding it. Good preparation is critically important for good results; on a 3 car garage plan 4 days worth of work to put down this coating. The first day will be sweeping, pressure washing, degreasing, acid etching, pressure washing until it is perfectly clean with a light dusty appearance (from the acid). Day 2 will be drying with fans and the door open. Day 3 is patching cracks and seams. Day 4 will be a final vacuum and putting down the epoxy (then 3-4 days to fully cure before parking on it).I would recommend wearing a respirator, even with the doors on this is pretty strong stuff. Having a helper with a brush to trim edges and seams while you use a good epoxy roller will make quick work out of the application and you can be done with a 3 car garage in a few hours (after all the days of prep). For this 3 car garage we used 2 full professional kits with almost nothing leftover (we had a third ready to go).
K**N
would do it again!
so far so good! researched a lot online before purchase. Preparation definitely is the key. I have a one car garage under house. Asphalt sealer was applied on concrete from former owner. Rented diamond grinder from HD, bought 4" grinder from HF $14.99 and diamond wheel from Amazon $11.00 for edges and corners. Sprayed whole garage with degreaser and power washed several times after grinding to ensure no loose material on floor. Painted walls and ceiling while letting floor dry for about 2 weeks, making sure there was no residual moisture.Was nervous about applying the epoxy because there is little room for error as far as time, not sure if enough there would be enough product for complete coverage due to some floor pitting and really no easy clean up if there was a mistake. All those concerns ended to be unfounded. Had about 250' to cover and had plenty with leftover. Also just threw away the paint brushes, rollers and tray. Started applying a little thin in case, but put on a little thicker using 3/8 roller, could see a little difference after but flakes covered the difference in sheen.Before combining the 2 gallons make sure to mix individually first! If not, you must scrape out the solids from bottom and sides, very messy and much more difficult.Results after about 2 weeks is great. Parked the car inside after a heavy rain storm, left a lot of puddles. Used sponge squeegee and it left the floor practically dry and clean!This product worked as stated, not sure how it compares with others, but I am very satisfied. I guess the years to come will tell!
M**I
Worth the extra money
Application was easy, more durable that other hardware store floor epoxies, easy to wipe up oil, water, chemicals, whatever! This professional version is much better quality than the standard epoxy.
Trustpilot
4 days ago
3 weeks ago